What is a form?
A form is an Access object. It generally serves three purposes:
- To allow users to perform data entry. Data can be inserted, updated, or deleted from a table using a Form object.
- To allow users to enter custom information, and based on that information perform a task. For example, you may want to ask a user for parameters before running a report.
- To allow users a method of navigating through the system. For example, you may create a form where a user can select a form to load, a report to run, etc.
You can view all of your form objects in the Navigation Pane. To do this, click on the Navigation Pane menu and select "Object Type" from the popup menu.
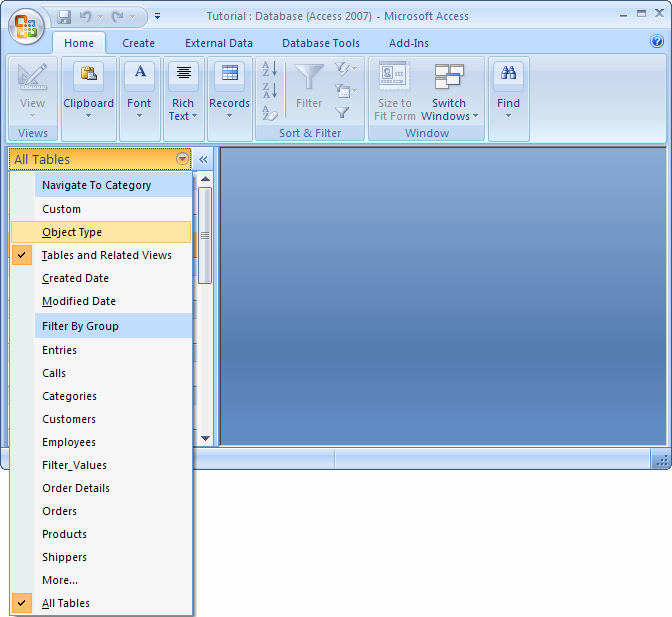
Click on the Navigation Pane menu one more time and select "Forms" from the popup menu.
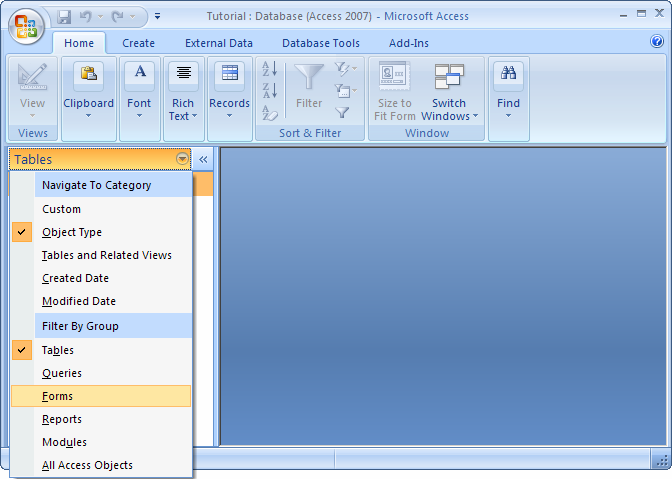
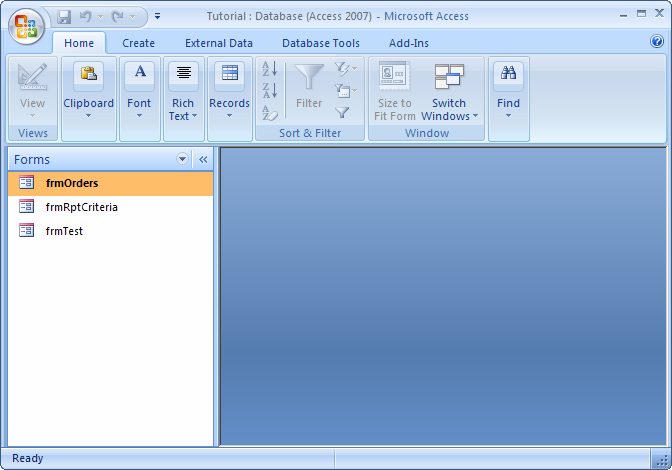
The Navigation Pane should now display all of the form objects in the database.
Creating a Form
Let's take a look at creating a new form "from scratch".Select the Create tab in the toolbar at the top of the screen. Then click on the Form Design button
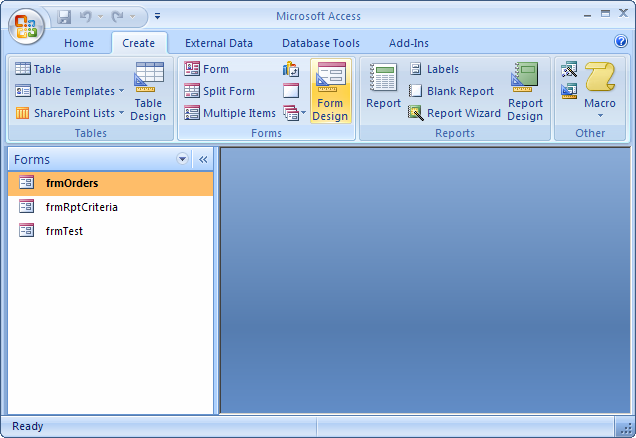
We are now viewing our form in design view. You should see a blank form that looks like this:
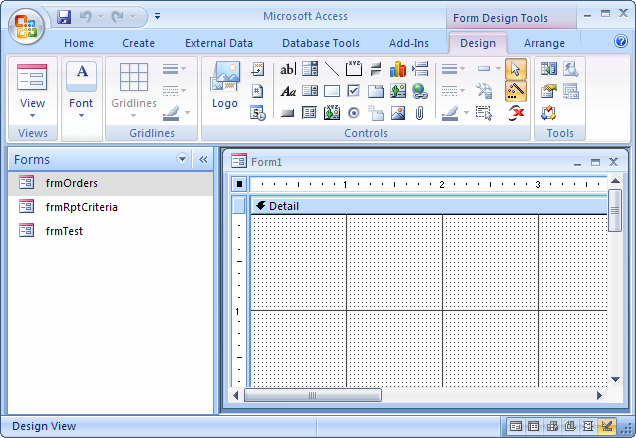
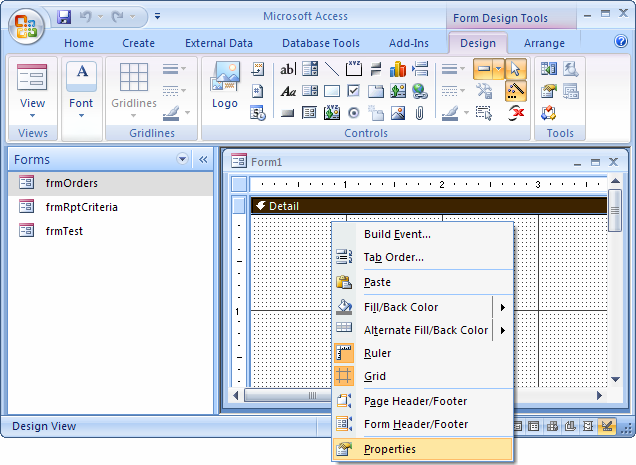
Right-click on the form and select Properties from the popup menu.
When the Property Sheet appears, select Form from the drop down. You should now see the properties for the Form object.
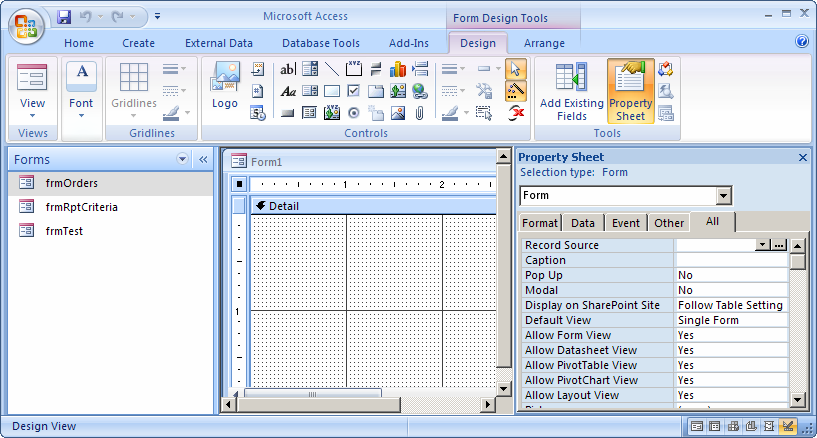
Let's take a few moments to explore some of the more commonly used properties for a Form object.
Record Source property
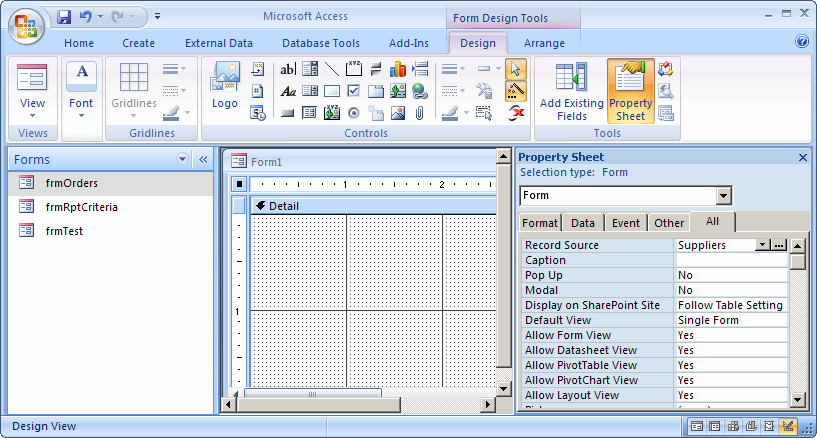
The Record Source property sets the source of the data for the form.For example, if you want to create a data entry form for the Suppliers table, you would specify Suppliers as the Record Source. This means that if you add a new record in the form, it will insert a record into the Suppliers table. If you modified a record within this form, the data in the Suppliers table would also be modified.
The Record Source property can be set to a table name, query name, or you can build your own SQL statement by invoking the Query builder (ie: clicking on the button with the three dots to the right of the Record Source property)
Caption Property
The Caption property is the value that displays in the title bar of your form.We'll set the Caption property to display "Add/Edit Suppliers".
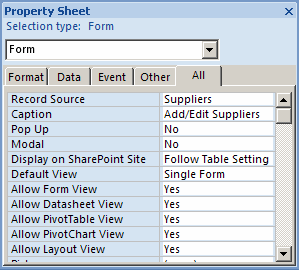
Now when we view the Form as an end-user would, it would look like this:
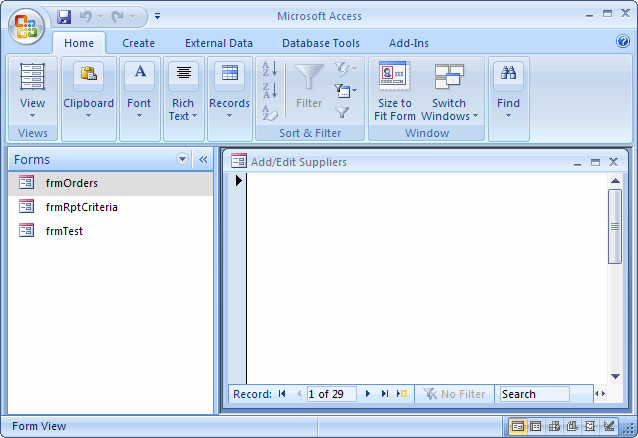
As you can see there is a title bar at the top of the form and it displays the value that we set in the Caption property.
Default View property
The next property that we will take a look at is called the Default View property. If you look at the options available, there are six values that you can choose from - Single Form, Continuous Forms, Datasheet, PivotTable, PivotChart, and Split Form.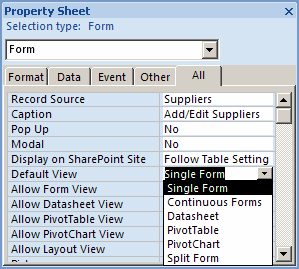
Single Form
The Single Form option allows a user to view one record at a time in the form. Below, we have a sample form that displays one record from the Suppliers table. At the bottom of the form, you will see (what we call) record selectors. This allows you to navigate from one record to another. You can also see that there are 29 records that you can navigate to in this form.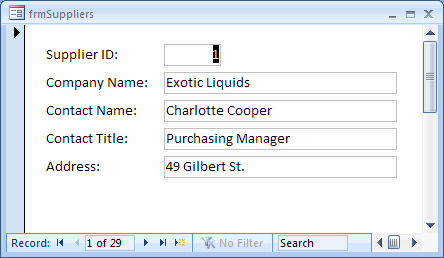
Continuous Forms
Another option is called Continuous Forms. This option allows you to see multiple records in the form at once. The scroll bar on the right allows you to scroll through the records. At the bottom of the form, you are still given the record selectors to navigate through the records. In this sample, there are 29 records that can be viewed in this form.
Datasheet
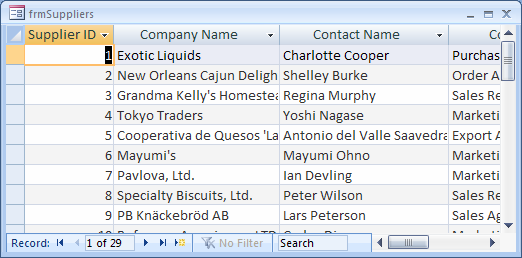
Another option is called Datasheet. This option makes the form appear as if you are looking at the actual table. In the datasheet mode, you can resize the columns or even reorder the columns by highlighting and dragging the column to another location.You are still given the scroll bar on the right to navigate, as well as the record selectors at the bottom of the form.
Split Form
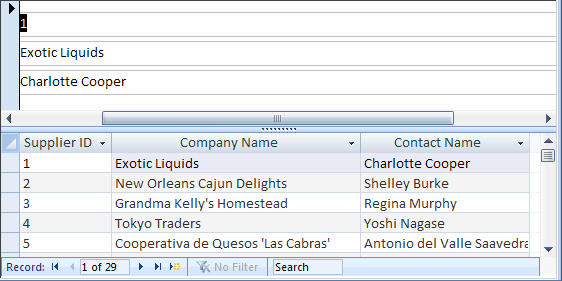
The final option that we'll look at is new to Access. It is called Split Form and gives you two views of your data:- The top of the form displays a Single Form which allows a user to view one record at a time.
- The bottom of the form displays a Datasheet view of the records.
Auto Center property
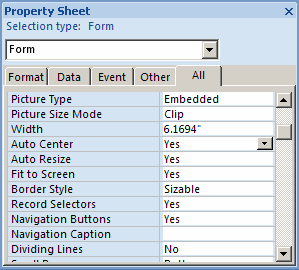
Another commonly used property is Auto Center. This property can be set to either Yes or No. If this property is set to Yes, the form will center itself automatically when it is opened.If this property is set to No, the form will appear in exactly the same position as you saved it (when you were in Design view).
That covers the more commonly used properties on a Form object.
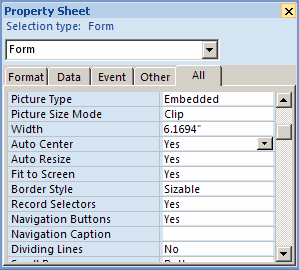
For the purposes of this tutorial, we've set the Form properties as follows:
Record Source = Suppliers

Caption = Add/Edit Suppliers

Default View = Single Form

Auto Center = Yes
You can close the Property Sheet by clicking on the X in the top right corner of the Property Sheet.
Now, let's build our form.
Adding objects to our form
Our next step is to add objects from the Suppliers table to our form.Since we've already specified our Record Source, Access gives us some nice features to quickly drop objects onto our form.
Select the Design tab in the toolbar at the top of the screen. Then click on the Add Existing Fields button in the Tools group.
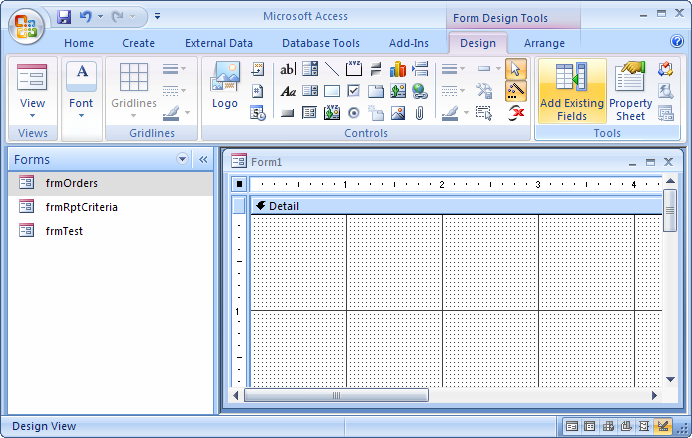
A Field List window should appear on your screen as follows:
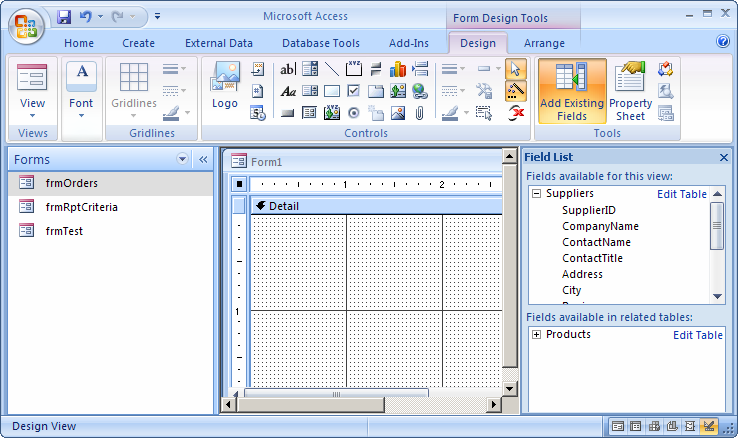
This window lists all of the fields that are available for your form to use, based on the Record Source property.
To add one of these fields to your form, highlight the object in the window, and then drag it to the location in the form where you wish to add this object.
We've chosen to add the following three objects to our form.
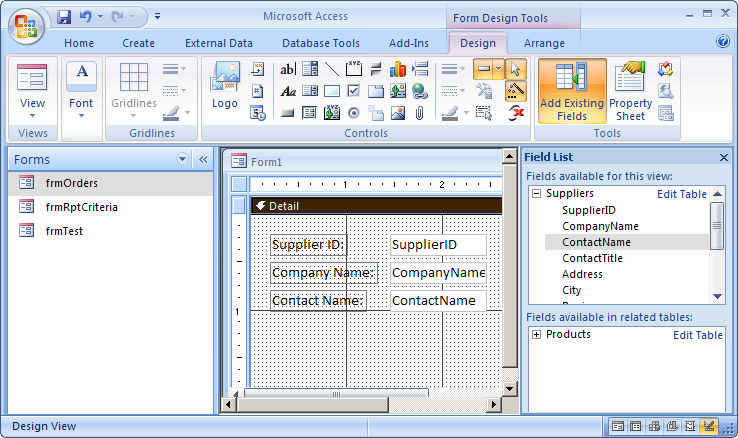
The first thing that you'll probably want to do is resize your objects. To do this, click the object that you wish to resize.
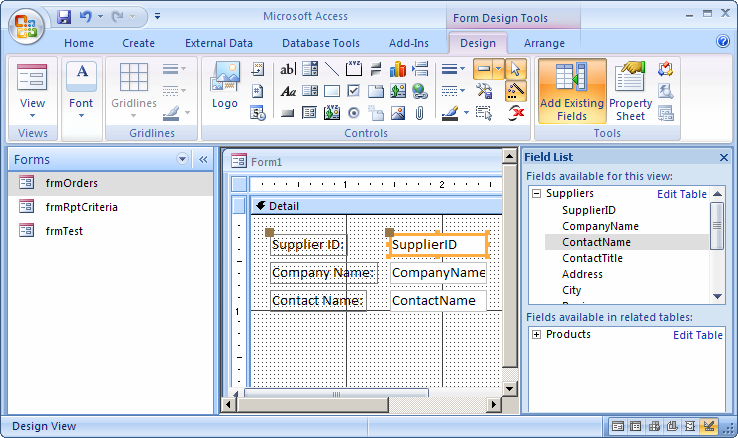
You should notice small boxes around the perimeter of the object. Move your mouse pointer over one of these "resizing boxes". When your mouse pointer displays double-headed arrow, hold down the left mouse button and drag the object to the desired size.
If you wish to move the object, move your mouse pointer until it looks like a diamond with 4 arrows. Then hold down the left mouse button and drag the object to the desired location.
Viewing your form as a user would
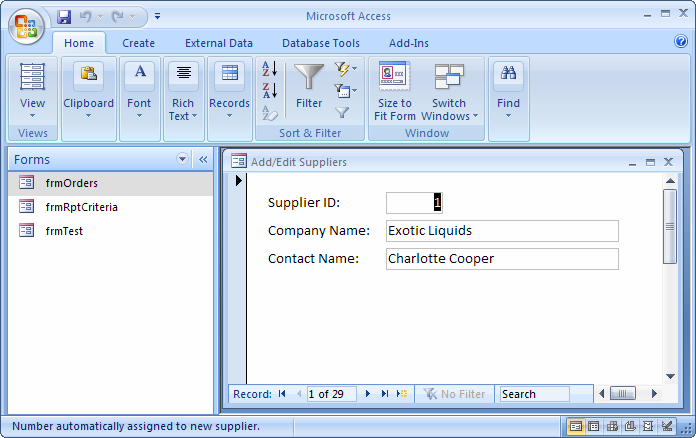
Now that you have finished placing your objects on the form, you will want to view the form as a user would. This whole time you've been editing your form in Design view.To view your form, select the Design tab in the toolbar at the top of the screen. Then click on the View button in the Views group and select Form View from the popup menu.

Our form looks like this:
Saving form
One final step is to save our Form object. You can do this at any time during creation of the form, but for the purposes of this tutorial, we are saving this as our last step.Click on the Save button
A "Save As" window should appear as follows:

Select a name for the form and click on the OK button. We usually always prefix our form name with "frm". It is just a naming convention that we use.
Now when you return to the Navigation Pane, you will see your form in the list.

Congratulations! You've now created your first form in Access 2007.
No comments:
Post a Comment